# Synchronisation
The Synchronisation module ensures that all data entered onboard is synchronized to the office and vice versa.
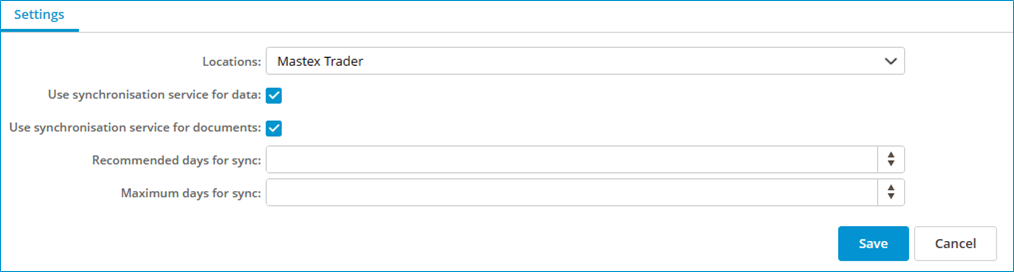
# How do I turn a synchronisation flow on and off?
1. Go to the module **Administration.**
2. Click on **Synchronisation.**
3. Select the location.
4. Select the desired synchronization flow. **Data synchronisation** or **Document synchronisation.**
5. Automatic synchronisation can be turned on or off with the **Use synchronisation service** option.
[](https://docs.mxsuite.nl/uploads/images/gallery/2024-11/synconoff.png)
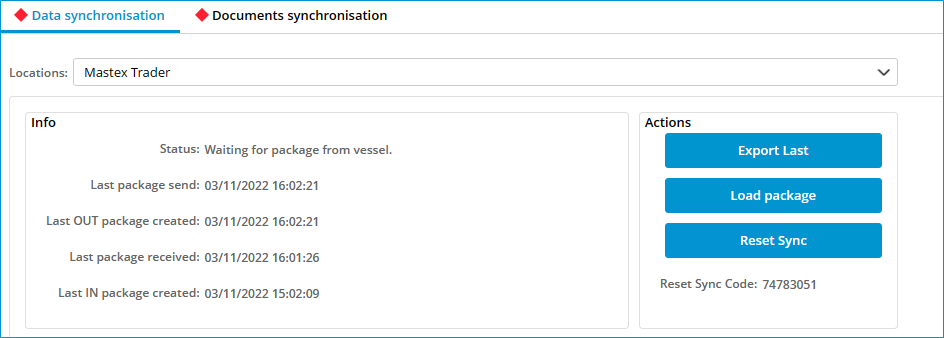
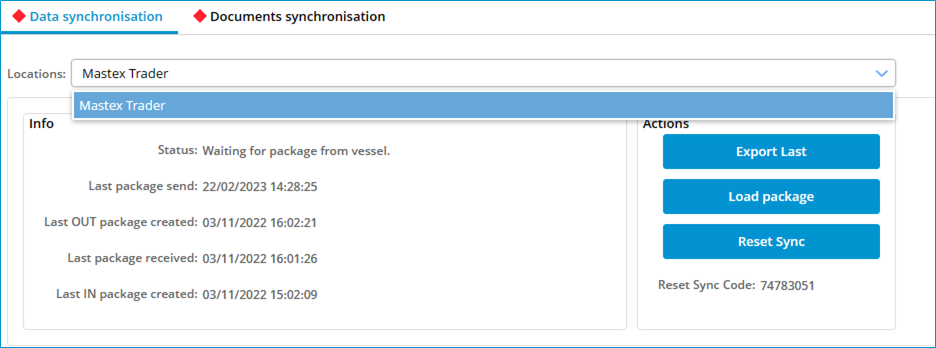
# How can I check the synchronisation?
1. Go to the module **Synchronisation.**
2. Select the location.
The info block displays the information regarding the synchronisation of the most recently sent packages.
[](https://docs.mxsuite.nl/uploads/images/gallery/2024-11/checksync.png)
# How can I check the status of the synchronisation process?
The icon of the MXSuite synchronisation service can be found at the lower right of the task bar.
The icon indicates the status of the synchronisation:
- [ ](https://docs.mxsuite.nl/uploads/images/gallery/2024-11/sync1.png)This indicates that the synchronisation process is working normally and is idle.
- [](https://docs.mxsuite.nl/uploads/images/gallery/2024-11/sync2.png) This indicates that the synchronisation process is working normally and synchronisation is taking place.
- [](https://docs.mxsuite.nl/uploads/images/gallery/2024-11/sync3.png) This indicates that the synchronisation process is not working normally.
# How do I synchronise manually (offline sync)?
To create and save a synchronisation package:
1. Go to the module **Synchronization.**
2. Select the location.
3. Click on **Export last** or on **Create package.**
4. Select **Offline.**
5. Click on **Ok.**
6. Save the file to the desired location.
To load a synchronisation package:
1. Go to the module **Synchronization.**
2. Select the location.
3. Click on **Load package.**
4. Select **Offline.**
5. Click on **Ok.**
6. Open the desired file.
The file name is structured as follows:
<ship name>\_Data\_<package number>.mxs
<ship name>\_Documents\_<package number>.mxs
# How do I synchronise manually (online sync)?
To create and save a synchronisation package:
1. Go to the module **Synchronization.**
2. Select the location.
3. Click on **Export last** or on **Create package.**
4. Select **Online.**
5. Click on **Ok.**
To load a synchronisation package:
1. Go to the module **Synchronization.**
2. Select the location.
3. Click on **Load package.**
4. Select **Online.**
5. Click on **Ok.**
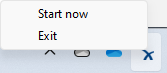
# How do I start manual the synchronise process?
1. Right click at the synchronisation icon in the taskbar
[](https://docs.mxsuite.nl/uploads/images/gallery/2024-11/synciconstartnow.png)
2. Click on **Start now**.
3. The sync process will start now.
# How can I check the synchronisation status of a multi office?
1. Go to the module **Synchronization.**
2. Click on **Locations.**
3. Select the desired office location.
[](https://docs.mxsuite.nl/uploads/images/gallery/2024-11/checksyncmultioffice.png)
The synchronisation status of a multi-office location is only visible at a primary office location and at the secondary office location concerned.
# How do I reset the synchronisation?
The synchronisation needs to be done both in the office and on board the ship.
##### In the office:
1. Go to the module **Synchronization.**
2. Click on **Reset Sync.**
3. Answer the verification question with **Yes.**
4. Click on **Create a package** to create the first synchronisation package.
5. Note down the **Reset Sync Code** as displayed in the office version.
##### On board the ship:
1. Go to the module **Synchronization.**
2. Click on **Reset Sync.**
3. Run the **Reset Sync Code** from point 6 and click on **Yes.**
4. Click on **Load Package** to load the first synchronisation package.
A new Reset Sync Code is created each day, with each one being valid for just a single day.
The time between resetting the synchronisation and loading the first package on board the ship must be as short as possible. If tasks, certificates and exercises have been signed off on board the ship and the first package has not yet been processed, the new expiry date can be overwritten by the first synchronisation package.
# What does ‘Resume package’ mean?
The button **Resume package** is visible when a synchronisation package is not completely loaded. This can occur if the loading of the synchronisation package is terminated prematurely owing to the computer being restarted, the database being temporarily inaccessible or another error message.
Clicking on **Resume package** continues the package loading process.
# What information does the synchronisation overview contain?
The following columns are visible in the synchronisation overview.
[](https://docs.mxsuite.nl/uploads/images/gallery/2024-11/syncdata.png)
Order number:
Synchronisation packages are assigned successive numbers and are only loaded if the number of the synchronisation package follows the number of the previous synchronisation package.
Package Direction
OUT: the package is sent to the other location.
IN: the package is received from the other location.
Creation Date:
The date that the synchronisation package was created at the other location. Changes in MXSuite have been processed in the synchronisation package through to this date.
Sent/Received Date:
The synchronisation package was sent from or received at the current location at this time and date. If a synchronisation package is resent by means of the button Export last, the date will be updated.
Size (bytes)
This is the size of the synchronisation package in bytes. If a package is approximately 1200 bytes in size, the package will be empty.