| **No fixed interval** | **Fixed interval** | |
|---|---|---|
| Expiration date | 1 January | 1 January |
| Date of first execution | 3 January | 3 January |
| Next expiration date | 3 February | 1 February |
| Date of second execution | 6 February | 6 February |
| Next expiration date | 6 March | 1 March |
| **Type** | **Explanation** |
|---|---|
| Time interval (default) | Enter an Interval and select day, week or month. The Due Date is calculated based on today's date + interval. Extra option: - Fixed interval [](https://docs.mxsuite.nl/uploads/images/gallery/2024-11/fWkimage.png) |
| Counter based | Enter an Interval and select a counter. Enter the Due Running Hours. If the current counter value has been entered, the hours will be added automatically. Extra options: - Fixed interval - Maximum interval Enter an interval and select day, week or month. This option allows you to perform a task with time intervals in addition to the counter. [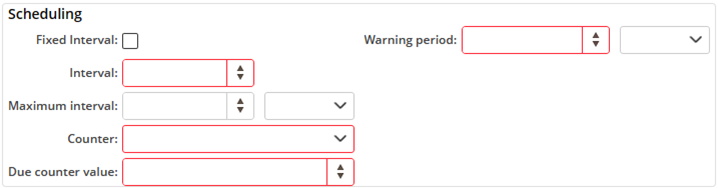](https://docs.mxsuite.nl/uploads/images/gallery/2024-11/0JGimage.png) |
| Project task | Select if the project task should be added to a selected type of projects. [](https://docs.mxsuite.nl/uploads/images/gallery/2024-11/bQaimage.png) |
| Use this task once / Defect | Select when the task should be performed. [](https://docs.mxsuite.nl/uploads/images/gallery/2024-11/38nimage.png) |
The option **Link from documents...** makes it possible to add a document from the module Documents.
# How do I add photos to a task? 1. Right-click on a task and select **Edit task...** 2. Go to the tab **Photos. [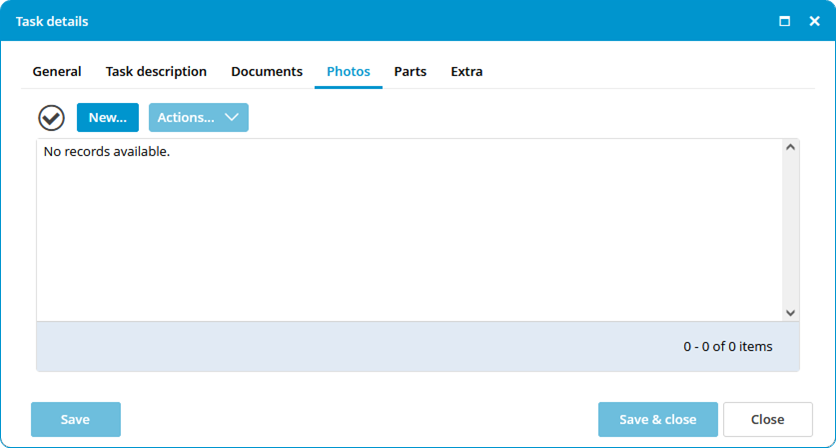](https://docs.mxsuite.nl/uploads/images/gallery/2024-11/assetstaskseditphoto.png)** 3. Click **New...** 4. Add new photos by browsing or drag & drop. [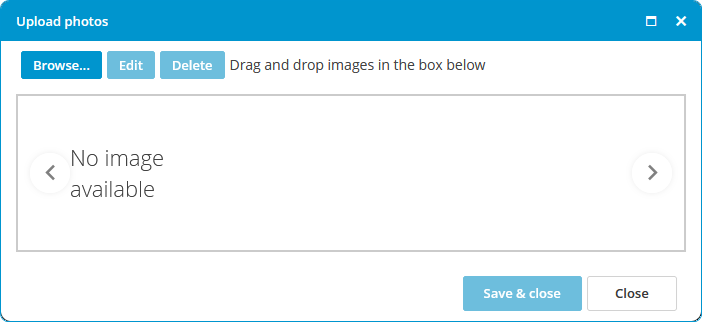](https://docs.mxsuite.nl/uploads/images/gallery/2024-11/assetstaskseditphotoadd.png) 5. Click **Save & Close.** # How do I link spare part(s) to a task? 1. Right-click on a maintenance task and select **Edit task...** 2. Go to the tab **Parts.** 3. Click on **Select Part(s)...** [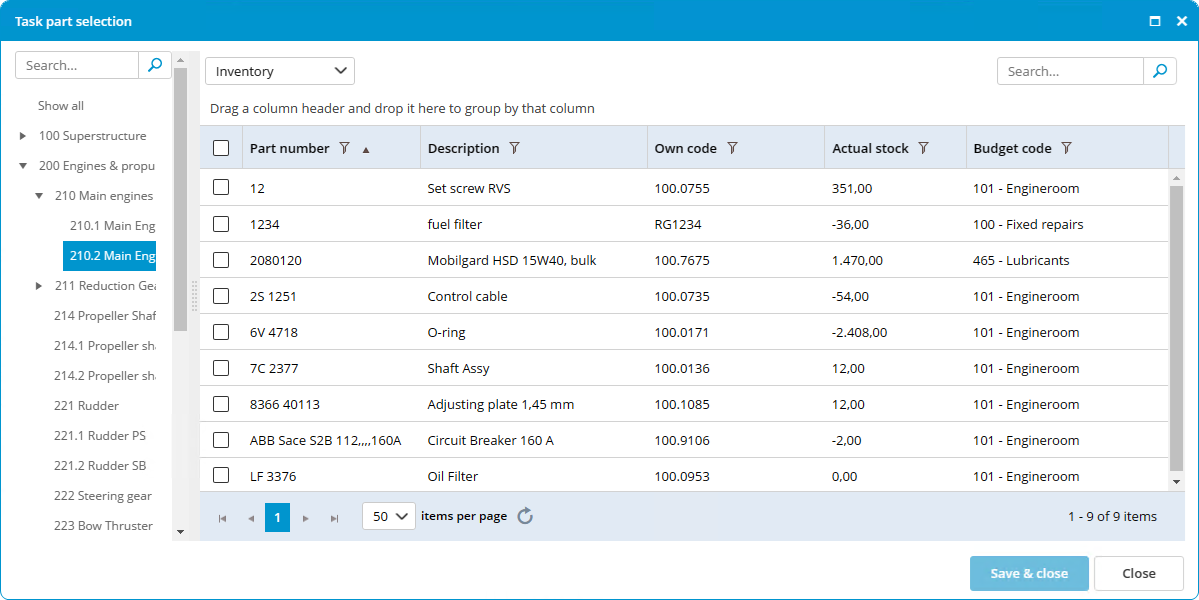](https://docs.mxsuite.nl/uploads/images/gallery/2024-11/edittaskselectparts.png) 4. Select the part(s) (you can select multiple parts using Ctrl or Shift). 5. Click on **Ok.** 6. Enter the quantity of parts needed. When completing the task, the stock of the selected parts will be updated. # How do I order the required parts for a task? 1. Right-click on a task and select **Create requisition...** 2. Select the parts you want to order. [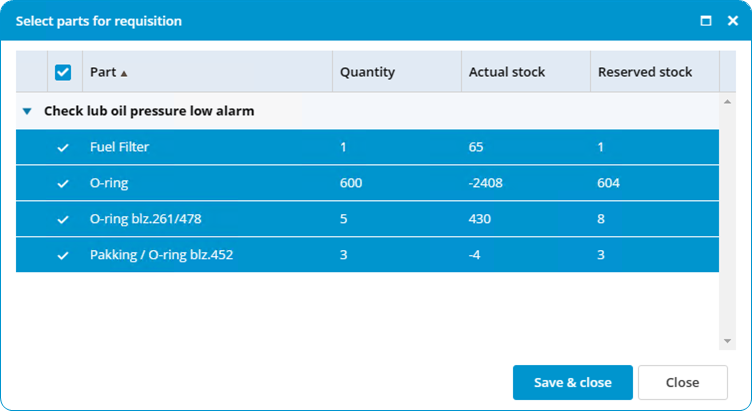](https://docs.mxsuite.nl/uploads/images/gallery/2024-11/assetestaskcreaterequisition.png) 3. Click on **Save & close.**An alternative option is to add the required parts to the basket, and use the basket when creating the requisition in the purchase module.
# How do I create a service request? 1. Right-click on a category and select **Create service request...** 2. Note the reason for the service request in the description. [](https://docs.mxsuite.nl/uploads/images/gallery/2024-11/assetscreateservicerequest.png) 3. Click on **Save & send.**If a defect is registered in the category, this defect will also be included in the service request.
# How do I mark a task as complete? A task can be performed from the work list and the module Maintenance. 1. Double-click on a **task.** 2. Enter a **Remark. [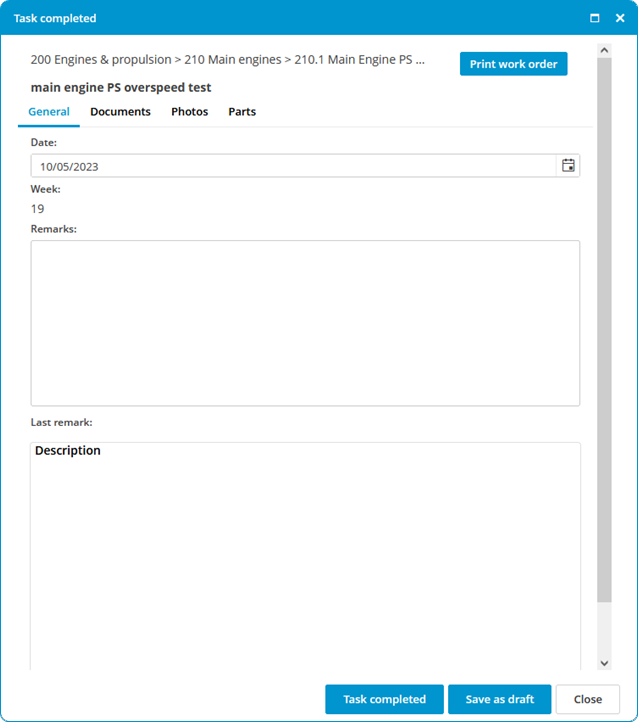](https://docs.mxsuite.nl/uploads/images/gallery/2024-11/assetstasksignoff.png)** 3. Click on **Task completed.** 4. The task will disappear from the work list and will be added back to the list at a predetermined interval.**Optional: Documents:** Here you can add documents to this task completion. **Photos**: Here you can add photos to this task completion. **Parts:** Here you can add parts to this task completion.
# How do I print a work order? 1. Double-click on a **task.** 2. Click on **Print work order.** 3. The **work order** will open in the standard browser. 4. Click on **Print.** **[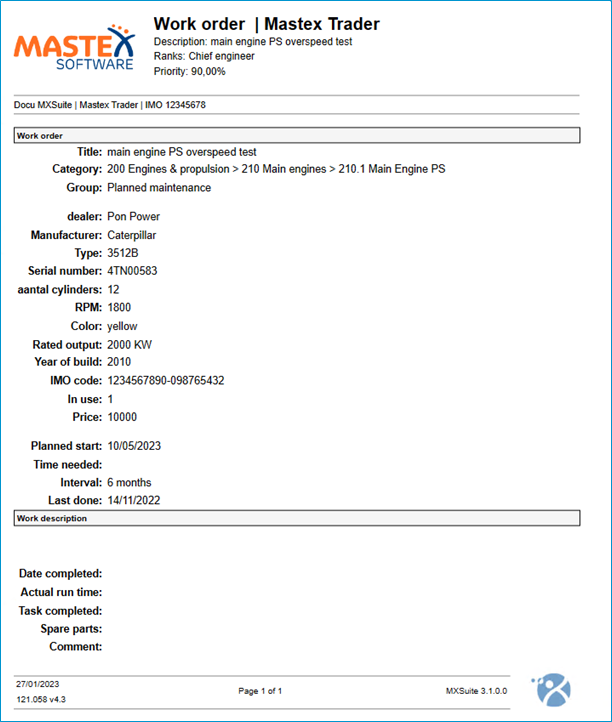](https://docs.mxsuite.nl/uploads/images/gallery/2024-11/printworkorderfortask.png)** # How do I see the history of a task? 1. Right-click on a task. 2. Select **Show history.** [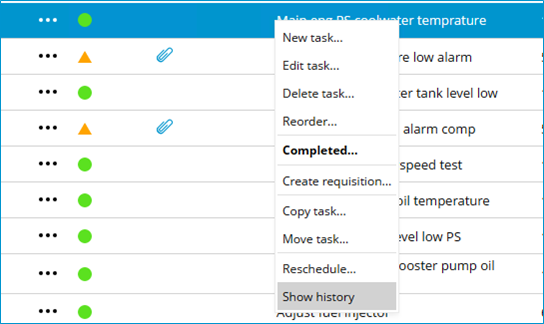](https://docs.mxsuite.nl/uploads/images/gallery/2024-11/showhistoryfortask.png)Right-click on a category, group, or task and select **Show history**. MXSuite will then open the module History and display the data for the selected category, group, or task.
# How do I undo a completed task? 1. Go to the module **History.** 2. Select **Assets tasks.** 3. Right-click on the task and select **Mistake.[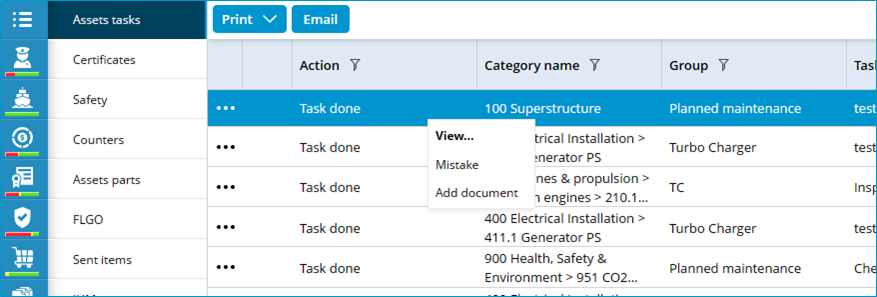](https://docs.mxsuite.nl/uploads/images/gallery/2024-11/historyassetstasksmistake.png)** 4. Confirm the mistake. [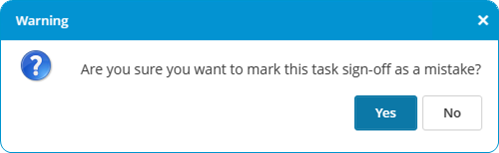](https://docs.mxsuite.nl/uploads/images/gallery/2024-11/assuremistake.png) 5. Click on **Yes**.For every task only the most recently completed task can be marked as a mistake.
# How do I add a document to a completed task? 1. Go to the module **History.** 2. Select **Maintenance.** 3. Click on **Search** to search for the relevant maintenance task. 4. Once you have found the maintenance task, there are two ways to add the document: - Right-click on this maintenance task and select **Add document.** - Double-click on the line or click **View** and then **New** to add the document.The option **Link from documents...** makes it possible to add a document from the module Documents.