Assets Parts
All parts can be registered in the module Assets Parts. The properties can be saved per part, along with the necessary order information. As MXSuite uses a central database, parts can easily be linked to various ships. The categorization ensures that parts are stored in an orderly fashion.
- What do the colours in the overview mean?
- How do I add a part?
- How do I link extra suppliers to a part?
- How do I make a part visible for another location?
- How do I delete a part?
- How do I adjust the stock?
- How do I move stock to another location?
- How do I link a part to a category?
- How do I link a part to a supplier?
- How do I specify hazardous material documents?
What do the colours in the overview mean?
The following colors are used in the overview:
- red: the actual stock is less than the minimum stock requirements.
- orange: actual stock is not sufficient for completing a task.
- red exclamation mark: this is a critical part.

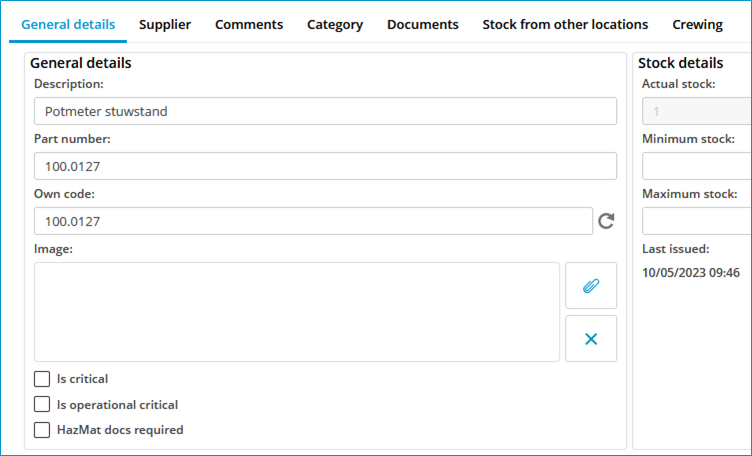
How do I add a part?
- Click on New...
- Complete all required fields.

- Click on Save & close.
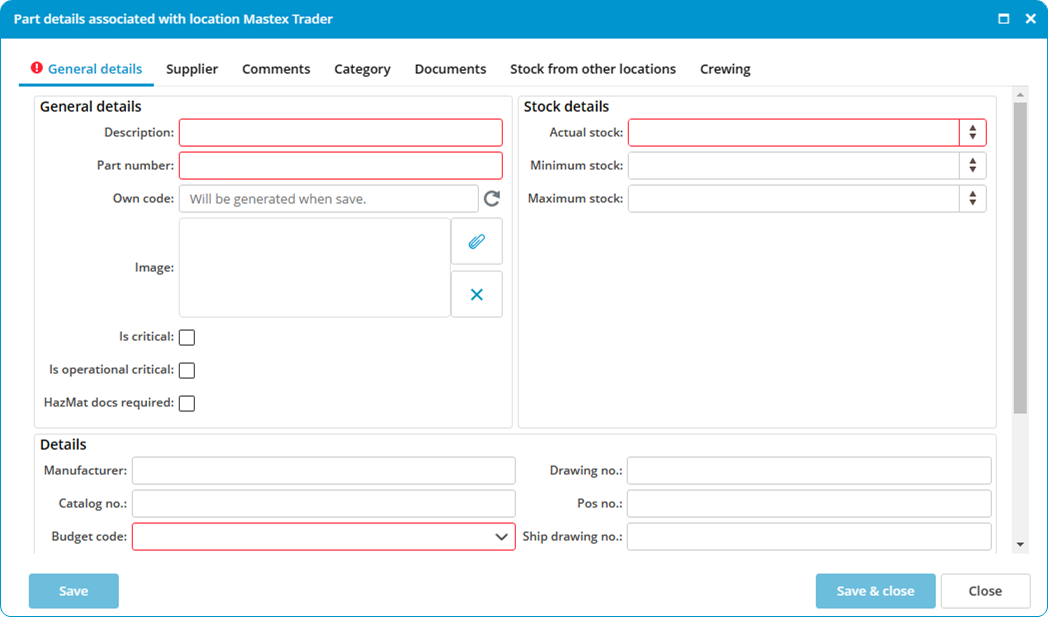
Own code: There is an option that allows you to generate the code automatically.
This own code is used as a reference during the import process. During the import process, MXSuite will check whether the part is present using the own code. If the own code is present during import process, the part will be overwritten. If the own code is not present, a new part will be created.
Material declaration document: This function allows you to link a material declaration document to a part. You can find it at Documents > Material declaration document.
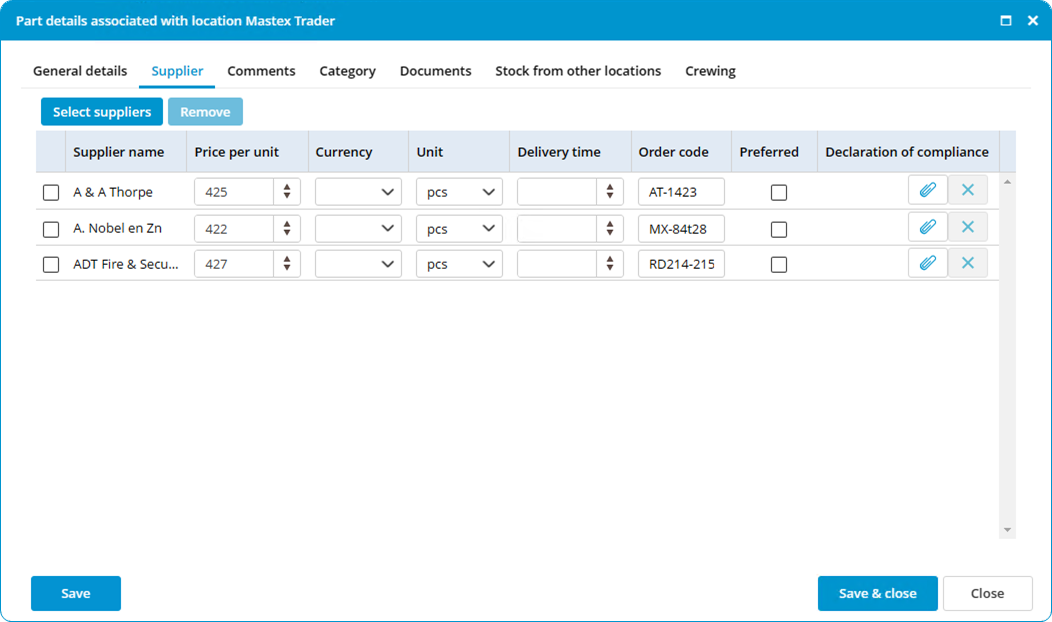
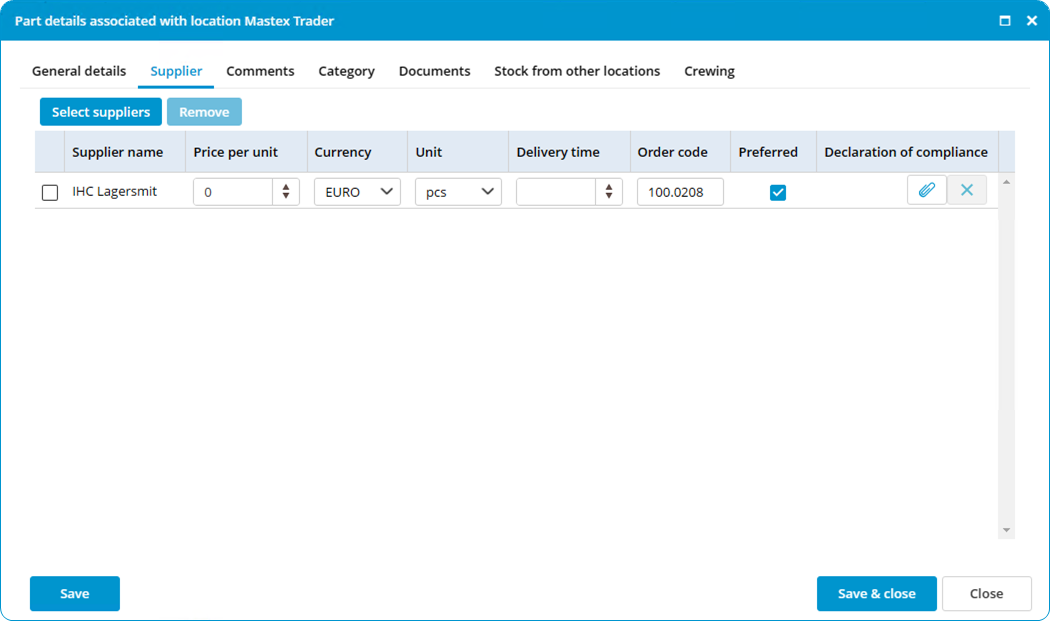
How do I link extra suppliers to a part?
- Right-click on a part and select Edit...
- Go to the tab Suppliers
- Click on Select suppliers and make a selection
- Enter the part information for the selected supplier, such as price, unit, order number, Declaration of compliance, etc.

- Click on Save & close.
How do I make a part visible for another location?
- Right-click on a part and select Edit...
- Go to the tab Stock from other locations.
- Select the location where the part must be visible.

- Click on Save & close.
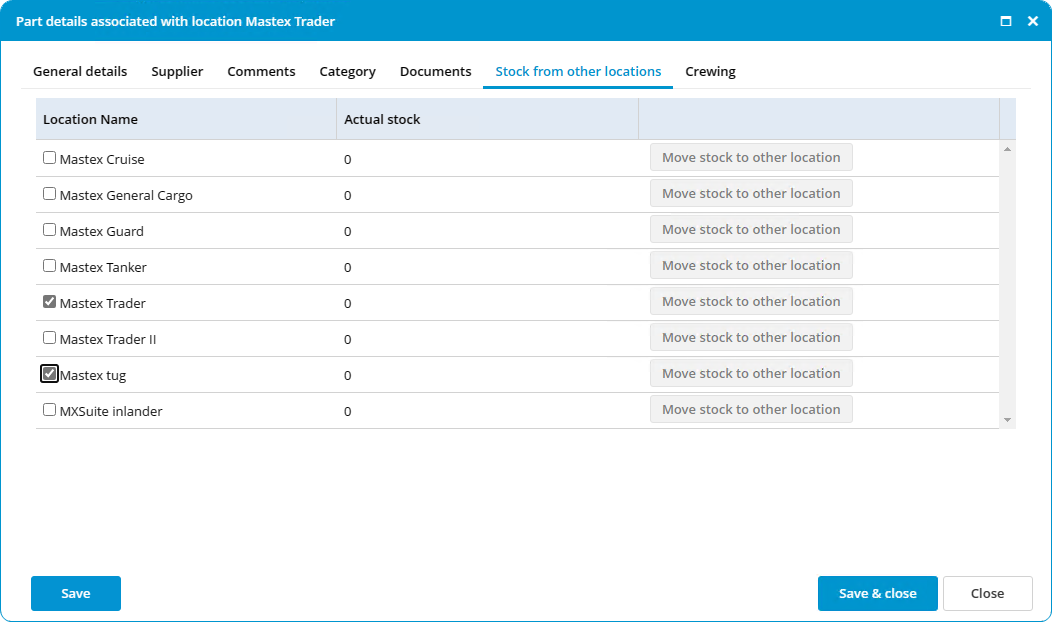
Use the Export and Import feature to assign multiple parts at once to another location.
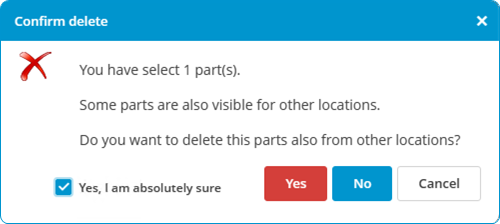
How do I delete a part?
- Right-click on an part and select Delete... (you can select multiple parts at once).
- Click on Yes to delete the part from all locations. Click on No to delete the part from the selected location only.
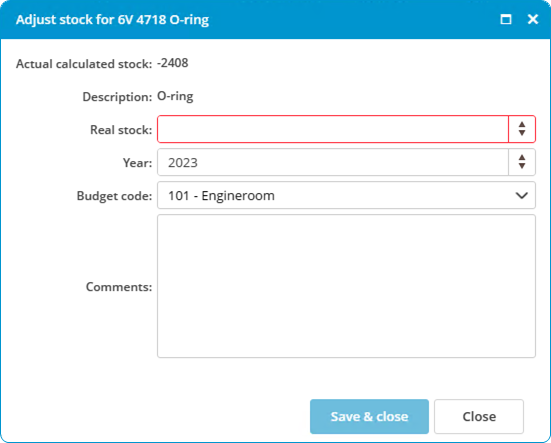
How do I adjust the stock?
The stock is automatically adjusted when:
- a maintenance task is executed to which parts are linked.
- a purchase order is marked as delivered.
Follow the steps below to adjust the stock manually:
- Right-click on a part and select Adjust stock...
- Enter the Real stock.

- Click on Save & close.
How do I move stock to another location?
- Right-click on a part and select Edit...
- Go to the tab Stock from other locations.
- Click right of the location name on Move stock to other location.
- Complete all required fields.

- Click on Save & close.

A change will be made based on the selected ledger account. This keeps the budget up to date. This change can be consulted in the history.
How do I link a part to a category?
- Right-click on a part and select Edit...
- Go to the tab Category.
- Select the category where the article should be displayed.
- Click on Save & close.
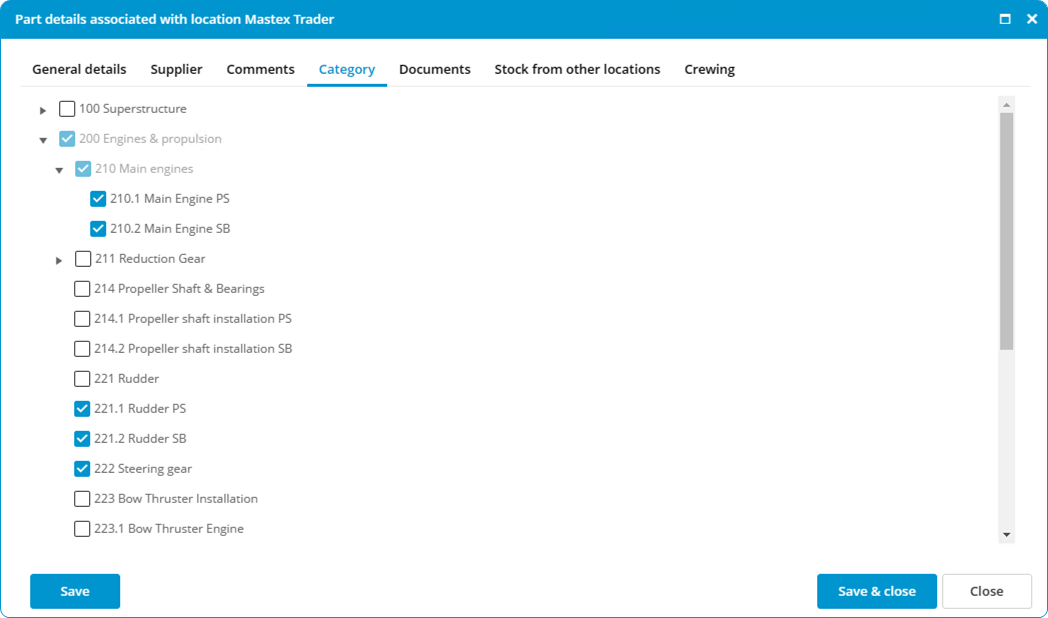
If a part is created while a category is selected, the article will be linked to the selected category.
How do I link a part to a supplier?
- Right-click a part and select Edit...
- Navigate to the Supplier tab.
- To set a preferred supplier check the box in the preferred column.
How do I specify hazardous material documents?
- Right-click on a part and select Edit...
- Go to the tab General details.
- Select the option HazMat docs required.

- Go to the tab Supplier.
- Add the Declaration of compliance.

- Go to the tab Documents.
- Add the Material Declaration document.


When the option HazMat doc required is selected, this will be visible on a printed purchase order for this part.